


If you haven’t built your own fishing rod yet, why not start with the most fun rod you’ll ever use? It makes a 12” crappie feel like a goliath grouper.
Rod Components
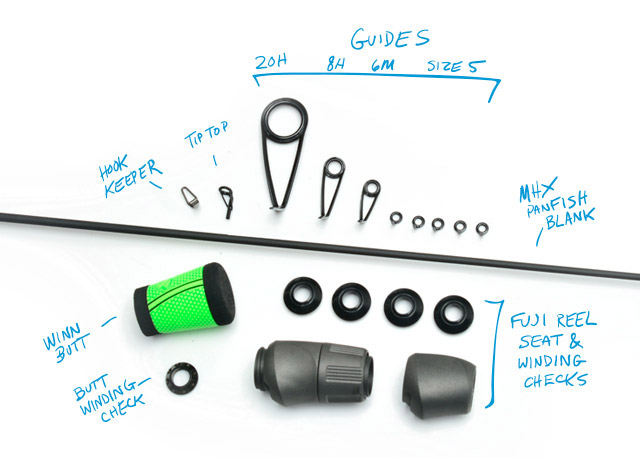
Here’s the ingredients to build this ultralight rod:
Rod Blank: Panfish Blank S661-MHX (5’6” ultralight)
Reel Seat: Fuji SKSS16 at Mudhole.com Split Grip Spinning Seat
Winding Checks: (1) DAWC-7.5-B & (4) WCS16-7 Fuji Graphite
Hook Keeper: BHKM10W Black Folding Hook Keeper
Guides: Fuji K Guides
Butt: BTC150-CT Neon Green Winn Grip 1.5” Butt
Thread: Prowrap CFS-B 552 (Neon Green to match Butt)
This rod is great because the blank is really thin in diameter. The MHX blanks in general are very light weight, but at .67 oz this thing is practically weightless.
This instructional assumes you know the basics of rod building. If not, check it out here…
Step 1: Attach the butt
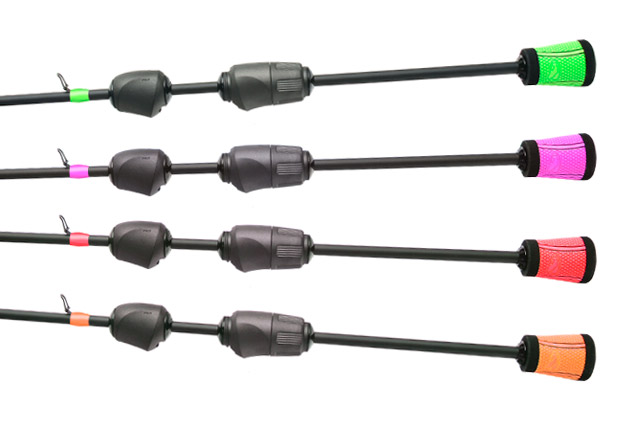
The butt of the rod and the matching thread are the only real pops of color on the rod.
Here’s an array with the different color Winn butts with matching thread:
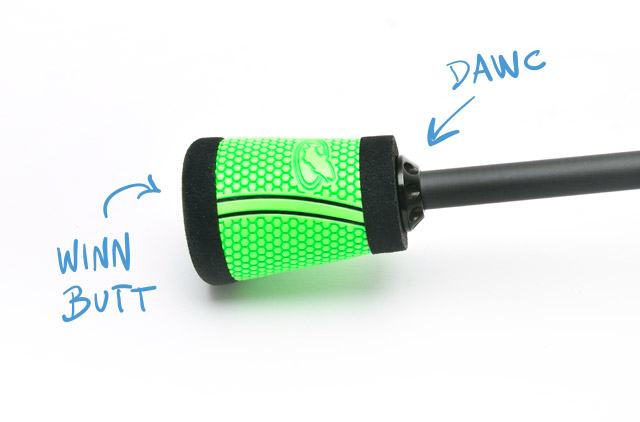
Attach the butt to the rod. You’ll have to make an arbor out of masking tape for the Winn Grip, then glue it up. Once glued, slide the DAWC winding check down and glue that on.
Step 2: Finding the Winding Checks
To find what winding checks to use, I checked Mud Hole’s resources for winding check dimensions on MHX Blanks, you can find it here…
The first set goes in at 5.5”, then 7.5”, 8.5”, and finally 9.5”.
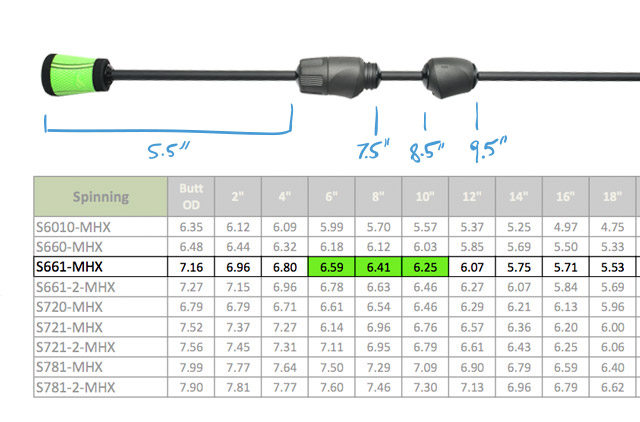
This means I need (4) 7mm winding checks.
Step 3: Attaching the Reel Seat
The SKSS16 seat should be centered at 8” from the end of the blank. This is based purely on me liking the way it looks and feels. Make sure to space the reel seat sections 1” apart to hold your reel right.
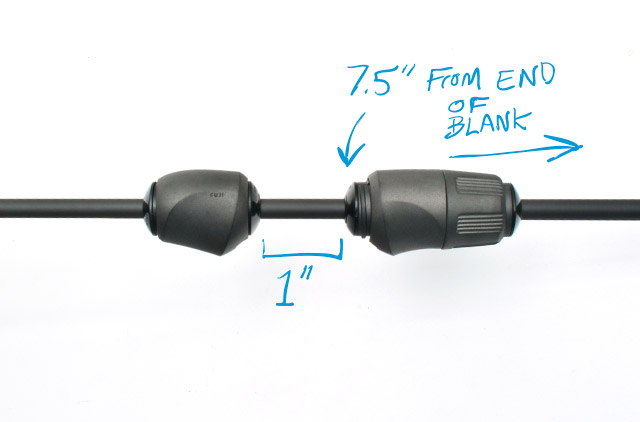
Tape up the arbors, attach the seat, and check for yourself. This is where you can adjust it if you’d like a slightly different distance.
Glue it up when you’re good to go.
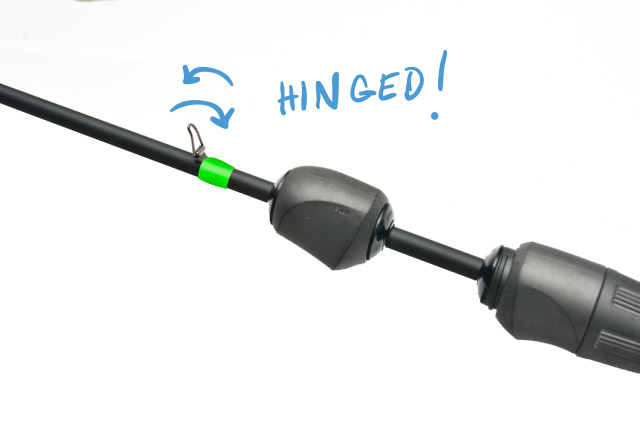
Step 4: Attaching the Hook Keeper
I wrapped the hook keeper on the opposite side of where my line would be running, about an inch above the reel seat.
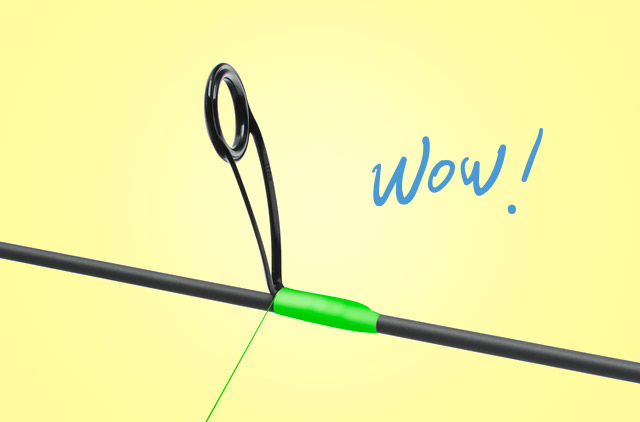
Step 5: Attaching the Guides
The Fuji K micro guides are great, but they’re confusing as hell to figure out how to size and space. It’s worth it though.
To figure out what I needed, I gave Todd Vivian at Mud Hole a call and told him what my set up would be. He needed this info:
- Blank length: 5’6”
- Reel size: Size 1000 Shimano Sedona
He suggested the Fuji 20H, 8H (The “H” stands for high), the 6M (“M” stands for medium), and four sets of BLAG-5 Fuji running guides.
He also suggested putting the guides this distance from the tip:
36” – 28.5” – 23” – 18.25” – 13.75” – 9.5” – 5.75” – 3”
Wrap those guides on with the neon green thread and attach your tip top.
Step 6:
Once everything is dry, you’re ready to hit the lake.
This custom rod is awesome fun to fish with – try it out!


