


Although the tandem spinnerbait is a very popular Bass fishing lure, it can be an equally effective lure for any fish that is attracted to flash and vibration.
Spinnerbaits are available in many forms and color variations, but nothing beats designing your own pattern to fit your unique requirements.
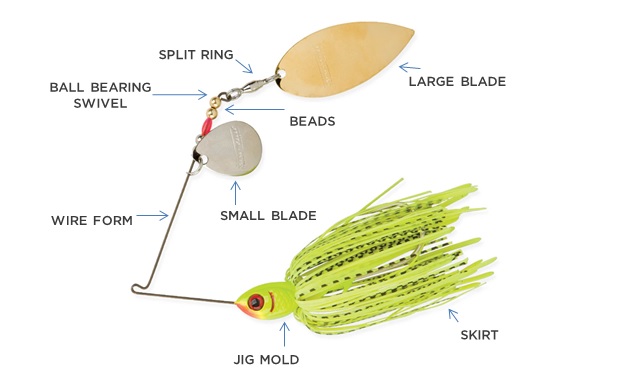
Components Of A Spinnerbait
Here is a brief visual glossary of terms we will use in this article, just so we are all on the same page.
Now for the fun part – making the spinnerbait!
15 Steps To Build A Spinnerbait
It is easier than you think, just follow these instructions:
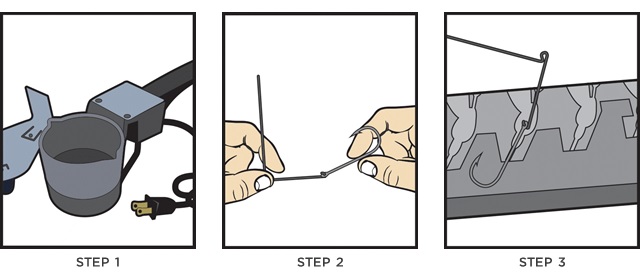
Step 1 – Getting Started
Preheat your lead and your mold using your lead melting equipment. Preheating your mold beforehand will allow the lead to flow smoothly into the cavity of the mold, remember you just want to warm your mold; it does not need to be hot to the touch. Be sure to heat your lead in a well-ventilated area as exposure to lead fumes is toxic.
Step 2 – Preparing the Wire Form
Prepare the wire form and hook for the mold. Pass the hook eye through the U bend of the wire form. Using your standard pliers, crimp the U bend closed securing the hook to the wire form.
Step 3 – Position the Form
Carefully lay the wire form and attached hook into the cavity of the mold that you would like to use. Make sure that the hook eye will have ample lead surrounding it when positioning the form in the cavity. While taking care to hold the wire form and hook in place carefully close the mold.
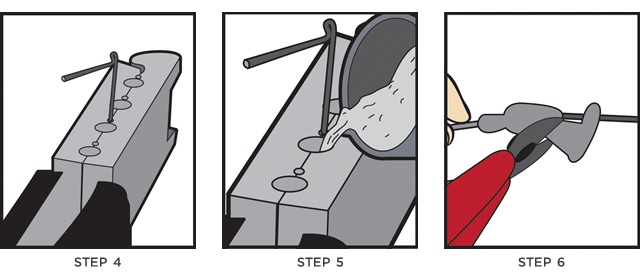
Step 4 – Check Alignment
Once the mold is fully closed, the wire form and hook will be held securely in place. At this point make sure that the rig arm sticking out of the top of the mold is as straight as possible. You are now ready to pour your lead.
Step 5 – Pour Your Lead
Wearing the proper safety attire (we suggest leather gloves and protective eye wear) pour the pre-melted lead into the mold cavity through the opening at the top. Try not to over fill the lead too much; some excess out the top however is not a problem. After pouring the lead keep the mold firmly closed for 15-30 seconds. After the lead has had time to harden and cool open the mold and remove the lure.
Step 6 – Remove the Sprue
The excess lead at the top of your new lure head is known as a “sprue”. Using your gate shears remove the sprue, cutting as close to the lure head as possible. Feel free to recycle your lead sprues for future use.
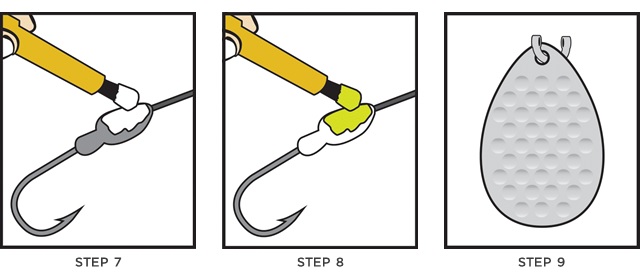
Step 7 – Apply Base Coat
We are now ready to finish the lure head. For this example we used vinyl lure paint, other options such as powder coating and air brushing is available as well. To achieve the most vibrant final color we suggest applying a white base coat to the unfinished lead first.
Step 8 – Apply Top Coat
After the base coat has fully dried, apply the top coat in a color of your choice to the lure head. If necessary apply a second coat after the first has fully dried to ensure the best color and proper coverage. To further customize your lure you can add a clear glow over coat.
Step 9 – Small Blade Assembly
We are now ready to build our small blade assembly. Using a folded clevis and a smaller sized blade of your choice, pass one end of the clevis through the blade opening. The blade style chosen here is entirely up to you, and the performance you are trying to achieve. It is not necessary to match the style of blade with the larger blade installed later.
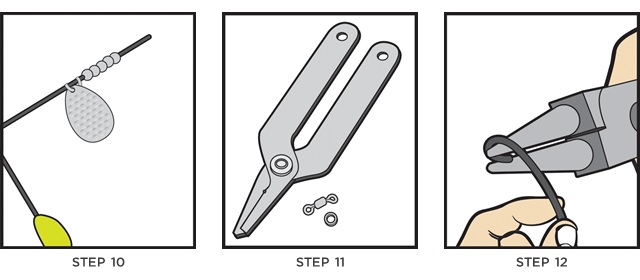
Step 10 – Attaching the Small Blade
Now attach the folded clevis with the small blade onto the rig arm of your wire form. Following the clevis slide on the metal bead spacers, you will need to use enough spacer beads to allow for enough clearance so that both blades spin freely. For our example we used size three nickel plated brass beads, again the style size and color beads chosen here is entirely to your discretion.
Step 11 – Large Blade Assembly
We are now ready to build the large blade assembly. Once again the style of blade chosen here is entirely up to you; typically this blade is a few sizes larger than the small blade. You will need to choose a size that will work with the lure you are creating. Using the split ring pliers to open your split ring, attach the split ring on the open end of your swivel. Then attach your chosen blade to the split ring as well.
Step 12 – Create a “U” Bend
Using the Round Nose Pliers, grabbing about 1/4? down from the end of your rig arm, pinch and roll the wire using the pliers to create a U bend at the end of the arm. During this step you will want make sure you leave enough clearance to install the swivel in the next step.
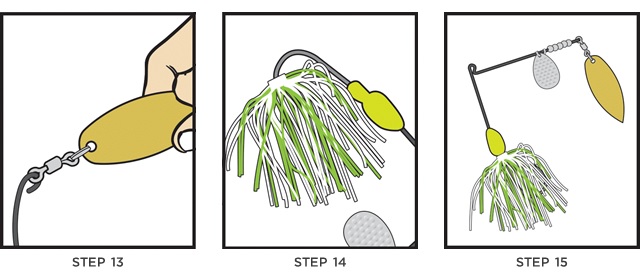
Step 13 – Secure the Large Blade Assembly
Attach the open end of the swivel for your large blade assembly. Using your pliers crimp the U bend closed around the swivel. This will secure the assembly in place.
Step 14 – Install the Skirt
Finally, attach your lure skirt over the hook and onto the collar just behind the head. For our example we installed a premade Z-Man EZ skirt. You can also create your own custom skirts in color combinations not readily available using silicone skirt tabs. There are several variables that will determine your skirt selection, such as water color, clarity and weather, so choose wisely!
Step 15 – Go Fishin’
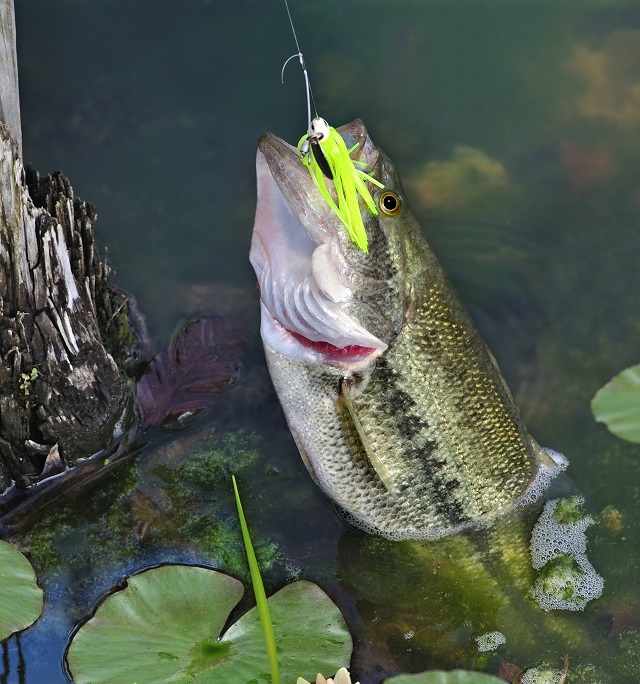
You’ve just completed building a tandem blade spinner bait. Please remember that not every lure you assemble, design from scratch, or copy from a brand name lure will work perfectly without a little tinkering or redesigning. It would be great if they all worked on our first attempt.
Don’t get discouraged if a few don’t work out as planned. Be prepared to take a few apart and rebuild them from scratch. It’s part of the fun. But in no time at all you too will be building a wide variety of incredible fish catching lures.
Give it a try!


